
Helllooo!
As promised, I have the tutorial here for the 'Thanks' card I entered into the Less Is More - Case it! challenge earlier this week. It is slightly trickier that the usual way that works for thin, single letter dies, as I have used a Bigz die, but it works and has a wonderful effect on your cards!
Ok, so you will need;
1 x DL card blank
Elements of Style stamp set
Stampin' Write Markers in Midnight Muse, Summer Starfruit and Gumball Green
Black inkpad
Bigz Alphabet Typeset letters
Stampin' Dimensionals
Pencil, ruler and rubber
and most importantly, Stamp-a-Majig!
fig 1.
Cut out your chosen letters with your Bigshot

fig 2.
Stamp your image in black ink onto your Stamp-a-Majig
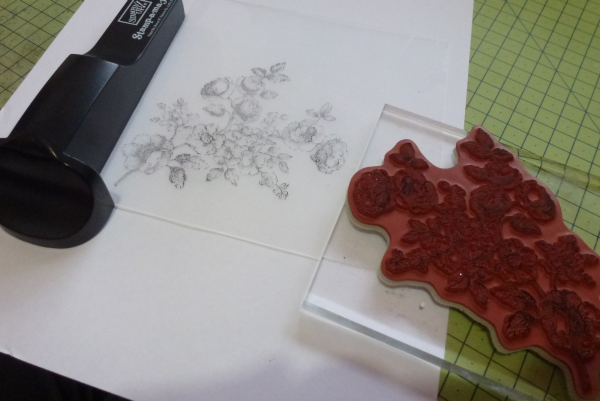
fig 3.
Ink up your stamp, picking out different areas with different colours

fig 4.
Line up your Stamp-a-Majig to position your image on the card blank and then stamp your coloured image.
*TIP* if your stamp appears to have dried a little before stamping, just 'huff' on it to re-activate the ink...it's water based so this works brilliantly!

fig 5.
Draw a line in pencil very softly across the card, for your letters to sit on to ensure they will be straight!

fig 6.
Re-align your Stamp-a-Majig image over the image on your card blank, making sure it is perfectly aligned. Tape down gently if you wish, remembering to use low tack tape! Then place your letters along the line you drew that you can see through the acetate stamped image. Again, use a little low tack or re-positional adhesive on the back of the letters if you wish to ensure they don't move.
*TIP* If you position the letters just slightly above your pencil line it will make it easier to rub out later!

fig 7.
Now line up the Stamp-a-Majig 'arm' with the acetate.

fig 8.
Re-ink your stamp, then stamp onto the letters using the Stamp-a-Majig to guide you.

fig 9.
Carefully remove the stamp and allow letters to dry before removing the Stamp-a-Majig arm.

fig 10.
You can then remove the letters and position them over your stamped image on the card blank, using Dimensionals to pop them up! Don't forget to rub out your pencil line too!
Et voila!! One beautiful and elegant card!!

I really hope you have found this useful, and easy to follow. It may seem like a lot of work, but it's not really, honest! I would so love to see your version, if you give it a go so please do leave a link to your creation in the comments and I promise to come see! And don't forget to enter it into this week's Less Is More challenge too! :)
If you would like to order any of the Stampin' Up items I have used here, please don't hesitate to contact me...I am always happy to help!
I am entering this into SUO Challenges - Anything Sizzix!
Enjoy playing! :)


Thank you for this very clear tutorial Lizy. Now I "need" the alphabet dies!
ReplyDeleteEveline.
This is absolutely STUNNING Lizy, thank you for sharing how its made xx
ReplyDeleteA beautiful card Lizy and an excellent tutorial too - thanks for sharing. Vicky x
ReplyDeleteLove this card Lizy, great tutorial - I'll be giving this a try. Gill x
ReplyDeleteThanks for a great tutorial Lizy. You made it very clear. Might have a go at this technique.
ReplyDeleteKat xx
Another great way of achieving this technique Lizy...and a superb tutorial.
ReplyDeleteThis one looks stunning, the mix of colours is gorgeous!
Thanks so much
Chrissie
"Less is More"
Lizy - that is a BEAUTIFUL card and very clever idea. Thanks for sharing your project with SUO Challenges.
ReplyDeleteLizy- love this technique and so kind of you to share the step by step tutorial. Thanks for the inspiration and playing along with us at SUO Challenges :-)
ReplyDeleteGorgeous card! Such a fun shape and a wonderful tutorial. Thanks for sharing and playing along with the SU! Only Challenges.
ReplyDeleteHi Lizy
ReplyDeleteCongratulations on your win at JAI - it was my first choice too. It is so beautiful - crisp and elegant. Thanks for a great tutorial- I will try it out with the smaller Timeless Type.
Thank you so much also for your sweet comment on my blog.
Mary
Great card and tutorial Lizy, I just used the HAM 'hit and miss' method myself he he :) Viv xx
ReplyDeleteyour card is absolutely gorgeous! I love it!
ReplyDeleteGorgeous card and thanks for the tutorial!
ReplyDeleteThanks for the great tutorial, Lizy. Congrats on having this beautiful card chosen @ LIM.
ReplyDeleteI can't wait to try this. Your card is so elegant. So very nice of you to share this with us. Thank you!
ReplyDeleteSTUNNING creation, and even though this one is more detailed then your other one, it still has that great CAS style!! I hope you visit our challenge again!!!
ReplyDelete