Showing posts with label Linen Thread. Show all posts

Tuesday, 26 April 2016

Awesomely Artistic Box Frame

Good morning!
So today I want to show you a little shadow box frame I made last week. I used a single 12in x12in piece of Perfectly Artistic DSP for this, and when I had made the frame I decided it looked 'beachy' so that was kind of where I took it...


I used the kind of heart shaped splodgy stamp from Awesomely Artistic, stamped in one of the brand new In Colors for this year, and shaped a length of Linen Thread into a kind of heart then added one of the little Clothespins to hold it in shape.


I finished this with three tiny little hearts in the bottom right corner, but I have a problem...I can't remember which stamp set it came from! Can you figure it out?? I have searched my sets and just can't find it so your help would be seriously appreciated!

I plan to complete the frame with a shell or too from my next visit to the beach...what do you think?

I know I made this using some retired DSP from Sale-a-Bration, but I just wanted to have a play and see how the box frame would turn out...I'm very pleased with it and plan to make some more using current DSP :)

Have a lovely day and if you would like to order any Stampin' Up! goodies please do click on my shop over there on the right >>>>>

Bye for now!


Monday, 7 March 2016

Perfectly Artistic Birthday

Good evening everyone!
I hope this post finds you well? 

I got the urge to craft a little tonight, so I had a little look to see if there were any challenges I could enter and I came across the sketch challenge at Freshly Made Sketches and decided to have a go. Here's the sketch...

And here's what I made using some DSP that has been sat on my desk for weeks! I decided to rotate the sketch, just to be different!


This is Perfectly Artistic from the Spring/Summer catalogue and I'll be honest, I had planned to add a Melon Mambo or Watermelon Wonder flower/butterfly, but when I got my Botanical Builder Bundle out I spotted the feather and went with that instead! 


I stamped the feathers using Sahara Sand for the main and Crumb Cake for the veins, then to give them shape after die cutting I creased them gently down the middle. I added some Whisper White Organza ribbon, the feathers and Linen Thread, and a sentiment from Petite Pairs.

I apologise for the photos...I'm not so good at taking them in the dark!

Have a lovely evening and I'll see you soon :)


Wednesday, 4 November 2015

Stampin' Up Reason For The Season Tutorial - making it easy!!

Good evening!
I hope this post finds you all well?
I have been busy crafting for my upcoming stall at the Worsley URFC Christmas fair recently, and I wanted to show you one of my new makes tonight. 

PLUS, how to line up the Reason For The Season stamps and punch bundle for quick and easy Poinsettias!

First of all, here is the finished project....Oh yes, this involves some clever upcycling too...

This gorgeous tealight/candle holder is made from an empty tuna tin and 22 wooden clothes pegs! I simply glued strips of Gold Glimmer Paper to each peg and clipped them to the can, then wrapped it all with some Natural Cotton Ribbon and Linen Thread. I then added the Gold Cording Trim and the stunning Poinsettia, complete with an Iced Rhinestone, coloured with a gold Sharpie.

Here's how it looks when lit...

Isn't it beautifully sparkly?! 

So, I promised to show how to line up the stamps and die to make this all so much easier right? Ok, just check out my little video below...


I think you'll agree that it really is a doddle right? I sometimes think that Stampin' Up! design products deliberately for us Demos to work out easier ways of using them! ;)

So would you like to have a go at making one of these? Well here is a list to all the Stampin' Up! products I used. Please just click on them to order direct from my online shop, or click on the link to the right >>>>>

Built for Free Using: My Stampin Blog


And don't forget, if you use this month's hostess code you will receive a free gift from me in December!

This month's hostess code
SE7WUZNV

I hope you enjoy making yours...I'd love to see them so please do leave a link to yours in the comments! :)


Sunday, 2 August 2015

This year's Teacher gifts using Watercolor Wings.

Hi everyone.
I back again this evening to share with you the teacher gifts Keiran and I made before the school holidays....


I picked up these jars from Home Bargains and filled each one with scented candles. 


We then decorated the lids with DSP and Washi Tape, then added some butterflies from Watercolor Wings, die cut with the matching Framelits. The little on top was made using the Label Bracket Punch and popped up on Dimensionals.


I printed off this lovely sentiment then die cut it using one of the Chalk Talk Framelits and attached it using Stitched Satin Ribbon and Linen Thread. 

They went down a treat and Keiran and I really enjoyed making them! 
Have a lovely Sunday everyone!


Saturday, 23 May 2015

A little metal...

Hey all!
Have you got a weekend of fun planned for this bank holiday? I am working, sadly, but we are going to Southport for a few days on Monday, which I am very much looking forward to!

I would like to welcome yet another new follower, Deborah to my little blog. She is incredible at colouring...you should check her cards out!

So today's card has been made for the new challenge over at Less Is More...it's been a long time since I entered on a Saturday morning! The recipe this week is ...
METAL

So here is my offering...


I used Work Of Art for this male card (yay a male card!). I masked off the middle section before stamping the long stamp in Sahara Sand, Crumb Cake and Tip Top Taupe, then scored across the panel.


The sentiment is from Remembering Your Birthday and stamped in Crumb Cake. I finished with a Gold Basic Metal Button along with some Linen Thread.

I'm off to work now...I hope you have a lovely weekend!


Tuesday, 17 March 2015

Amazing birthday!

Hello!
As promised, here is one of the cards we made at my craft class on Friday evening...

I recently got myself the Hearts and Stars Decorative Masks, so I decided to have a play. I sponged Baked Brown through the mask using a Sponge Dauber onto Very Vanilla cardsock and mounted it onto a Cajun Craze card blank.


I then inked the sentiment banner stamp using my Stampin' Write Markers and stamped it, with an extra 'happy' to pop up on Dimensionals. I added this to my striped banner, added some Linen Thread underneath and popped the whole thing onto the card. 

I really love the effect of the stars, as did my ladies at class, and of course they loved getting inky too!

If you would like to attend one of my classes, please do contact me...they are friendly and informal, and lots of fun! The details are on the tab at the top of this page.

I will be back tomorrow with another card made in our class, using the same set...have a lovely Tuesday!


Friday, 6 March 2015

Read all about it!!

Hello all!
I have a very exciting weekend ahead of me...I am going to the Country Music Festival at the 02 London tomorrow and I can't wait! There are loads of artists that I'm looking forward to seeing, but my favourites are definitely Lady Antebellum!

So I may be missing for a couple of days, but I'm sure you'll survive without me! ;)

Ok so on to today's card...

I am making a concerted effort to make more 'man cards' recently as I never seem to have very many in my stash...they are just so much harder to make, don't you think? 

For this one I used some of the Typeset Speciality Paper and after I had cut my piece, I screwed it up to give it a little texture before sticking it to my card blank.


The sentiment is from Label Love and is punched with the matching Artisan Label punch, which I then layered onto a Scalloped Oval, with a little Linen Thread behind, again for texture and interest.

I do quite like this one...I think it's perfect for those males that like to pop their feet up and read the paper on a Sunday morning!

I did use a couple of challenges for inspiration...


If you love Stampin' Up! products as much as me and would like to place an order, please click on the shop link over there >>>>>> 
or feel free to contact me directly as I would love to chat crafty and maybe place an order for you!

I hope you have a fun weekend planned and I will see you very soon!

Tuesday, 25 November 2014

Gorgeous Grosgrain and joining offer!

Good morning!

I have exciting news about a joining promotion to tell you about that started today...more about that at the end!

I am here again with another candle I decorated for my stall on Saturday. This time I have used all current products...


I used the gorgeous, and very Christmassy, Cherry Cobbler Striped Grosgrain ribbon, I wrapped the ribbon with Linen Thread, then added a wooden snowflake from my stash, and finished with a Basic Rhinestone which I coloured with my Cherry Cobbler Blendie. 


I do love how this ribbon works so well on the candles...I'm hoping they will be big sellers on Saturday!

So, about that joining promotion....


Just for one week only, from 25th November until 2nd December, you can join for just £74.25!! You still get the same fantastic joining kit; comprising catalogues, order forms and workshop invitations, PLUS £130 worth of products of your choosing!!


Not only that, but you will also get 5% cashback on all orders you or your customers place during December! 


As a new demo, during your first 40 days, if you place an order of £150 or more, you get 30% off, instead of the standard 20% thereafter. Which means that if you place this order during the promotional month of December, you will get a further 5% off, meaning your £150 order would cost you only £97.50!! 

So all in all, you could get yourself £280 worth of gorgeous Stampin' Up! goodies for only £172! But then you've done the maths right??

So what are you waiting for? I would love you to join my lovely team of demos, and when you do, I will send you a welcome gift, and you will also be privvy to our exclusive Facebook group too.

Join My Team

If you would like more information, please do feel free to contact me...I am happy to answer any questions you may have. 

Don't forget, this offer is available for any potential Demonstrator....hobby, business, casual...so take up the offer and enjoy the crafting! :)

Have a lovely day and I hope to hear from you very soon!

Monday, 10 November 2014

Vintage Candles

Hello everyone! 
How is your weekend so far? 
I had my craft class on Friday evening, which was brilliant, as usual! I will share our projects tomorrow :) 
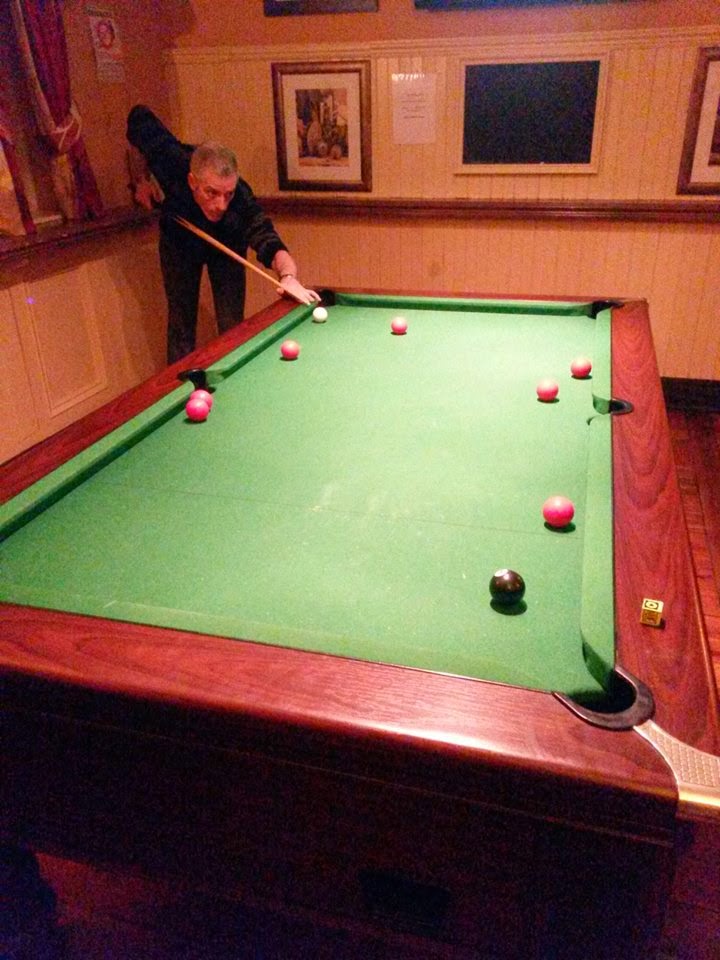
I was working for most of the weekend, but Mike and I went out for a game of pool on Saturday, and I did manage to craft a little...


I have been on a mission to make lots of pretty things for a stall I have later this month. So these candles are just perfect for it! I have used Designer Series paper on these... this is retired but any would work just as well, especially the Typeset Speciality Paper!


I then decorated them with Petite Petals and Papillon Potpourri, stamped onto the same DSP, and punch with the matching punches. I tied Venetian Crochet Trim and Linen Thread round the candles to add a shabby chic look. I finished with some tiny Basic Pearls.

Of course, they then needed packaging!

To make the base, I cut an equilateral triangle with 36cm sides, then scored each side at 5cm. I then cut along the scoreline in each corner to make a flap, then simply folded it all together and glued! I finished with floristry cello wrap, Crochet Trim and a butterfly. This is now a quite sturdy and pretty looking gift!

If you would like to order any of the Stampin' Up! products I have used, please feel free to contact me, or follow the link to my online shop, just over there >>>>>

Ok so before I go, I just thought I would share a photo of me and Mike playing pool...

This is me about to pot the black after just potting all 7 of my yellows in my first shot!


And this is Mike taking his shot after I missed potting the black!! *face palm*


Have a lovely Monday...I hope it's not too traumatic for you!


Friday, 26 September 2014

Baubles!!

Good morning!
It's time for our new challenge at CAS-Colours and Sketches, and I have literally just made this card! I have such a hectic week that I just didn't get chance to design my card, and really thought I wasn't going to make it in time! But I was up at 6.30 this morning so I had a bonus half hour before Keiran got up!

So this week is a sketch from Louise...


And here is the quick card I made!


I have used a retired stamp and punch bundle for this. I heat embossed the baubles with Cherry Cobbler and Gold Stampin' Emboss.


I embossed the bottom panel with the Modern Mosaic EF...it kind of matches the baubles don't you think? The ribbon is Cherry Cobbler Seam Binding.

Here is what I used...
If you would like any of the items I used, I would be very happy to place an order for you, or, if you prefer, you can simply click on the pictures to find the items in my shop :)

Right...time to go and get breakfast ready! Have a lovely Thursday!


Friday, 1 August 2014

Feeling soppy!

Good morning!
I am in a very good mood today! Well, actually, I have been for a while now, so maybe I should explain...
*WARNING* Soppy post!!

A few weeks ago I met a wonderful man named Mike, and we have been seeing other since then. He makes me smile all the time and I am very happy! Anyway, I don't get to see him everyday, but I find myself thinking about him all the time, so I decided to make him this little card, which I posted and he got this morning, so now I can share...


I used elements all from the Hip Hip Hooray kit (appropriate name!) and added the sentiment from the Bloom With Hope Hostess set, stamped in Baked Brown Sugar. I also added a little Linen Thread and a heart punched from Baked Brown Sugar DSP with the new Itty Bitty Accents Punch Pack.


I do love the sentiment and it's perfect for how I feel these days!

Ok...normal service will resume tomorrow, but I can't promise I won't get soppy again in the future! ;)

Have a lovely Friday!


Wednesday, 30 July 2014

I'm back!

Good morning!!
Wow I feel like I haven't blogged for an age! In case you didn't know, I have been away in Holland for a week, and I have been busy with wedding stationery since I got back, so last night was the first chance to have a little play in my craft room!

Here's what I made...


I had a really good run on notebooks at my last fair so I thought I should get a start on some more. This one is a cheap hardback book I bought from a local shop, and I stamped directly onto the cover using one of the lovely new Hostess stamp sets, Bloom With Hope. I really love this set...there are some gorgeous flowers and really lovely sentiments too.


I stamped one of the flower stamps repeatedly in Baked Brown Sugar, then I used Lost Lagoon and an Aqua Painter pen to colour the flowers. I finished with the Very Vanilla Seam Binding and some Linen Thread.

I will hopefully get back into the swing of things now, so I shall see you tomorrow with my DT card for CAS-Colours and Sketches.

Have a lovely day!


My most popular posts